Learn the steps to create flaky and rich pain au chocolat, a classic French pastry that envelops dark, melting chocolate in buttery croissant dough.
Key takeaways:
- Use high-quality ingredients for delicious pain au chocolat.
- Follow proper measurements and temperature control for perfect dough.
- Roll dough tightly around chocolate and let it rise.
- Brush with egg wash and bake until golden brown.
- Practice proper lamination technique for flaky texture.
Inside
Ingredients
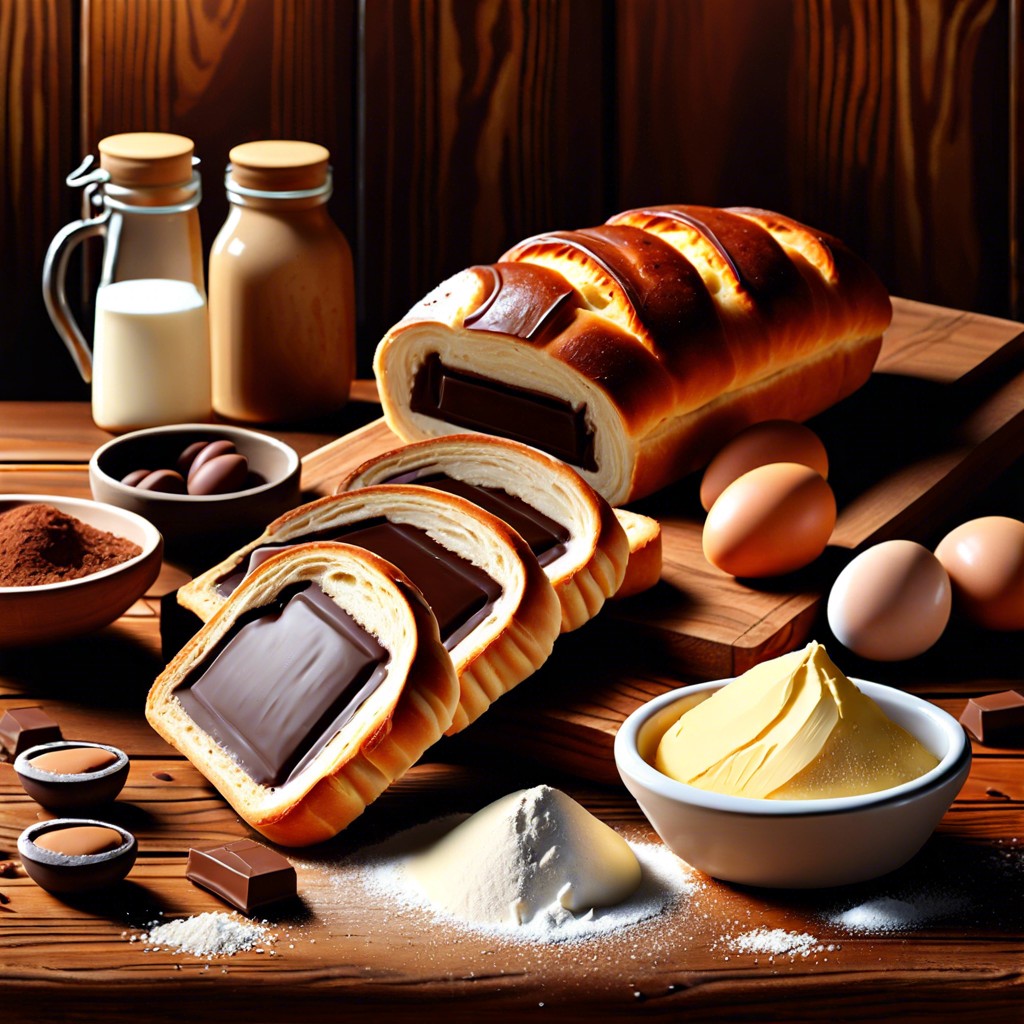
Selecting high-quality, fresh ingredients is crucial for a delicious pain au chocolat. Key components include:
- Flour: Use strong bread flour to ensure the dough has enough gluten to create layers that are both tender and flaky.
- Yeast: Active dry or fresh yeast is preferred for leavening the dough, contributing to the puff during baking.
- Butter: Opt for high-fat, European-style butter for its lower water content, which allows for better lamination and flavor.
- Chocolate: Choose good-quality dark chocolate with a high cocoa content for a rich, intense chocolate filling.
- Sugar: Moderates the yeast fermentation and adds a touch of sweetness to the dough.
- Salt: Enhances the overall flavor and regulates yeast activity.
- Milk: Adds tenderness to the pastry and richness to the flavor profile.
Proper measurement is key; too much flour or butter can affect the dough’s texture and the pastry’s final quality. Using unsalted butter and chocolate allows control over the salt and ensures the perfect balance of flavors. Temperature impacts the behavior of yeast and butter, impacting the dough’s rise and the pastry’s crispness, respectively. Work with chilled ingredients to maintain structure and achieve the characteristic layers of butter between the dough that pain au chocolat is known for.
Instructions
Begin by rolling out the dough into a large rectangle on a lightly floured surface. Cut into smaller rectangles, each large enough to encase a portion of chocolate. Place a stick of chocolate at one end of each dough rectangle, then roll tightly, enclosing the chocolate. Seal the edges by pressing gently. Arrange each prepared piece on a baking sheet lined with parchment paper, with adequate space between them to allow for expansion.
Cover loosely with a clean kitchen towel and let them rise until puffy, which typically takes about 1 to 2 hours in a warm environment. The proofing stage is crucial for developing the texture and layers, so ensure the room isn’t too hot or cold, aiming for around 75°F (24°C).
Preheat your oven while the dough is in its final stages of rising. Each oven is different, so it’s important to know yours well. A temperature of 375°F (190°C) generally works well.
Prior to baking, brush the tops with an egg wash to give a golden, shiny finish. Bake until they are puffed up and display a rich, golden brown color, approximately 15-20 minutes. Keep an eye on them as oven temperatures can vary and can affect the baking time.
Remove from the oven and place on a wire rack to cool slightly before serving. They are best enjoyed warm, when the chocolate is still slightly molten.
Lamination Process
Achieving the signature flaky texture in pain au chocolat hinges on the lamination process. This involves folding and rolling butter into the dough multiple times to create thin, distinct layers. It’s crucial to start with cold, pliable butter; too soft, and it will merge with the dough, too hard, and it will tear through.
Begin by rolling the dough into a rectangle and encasing a slightly smaller rectangle of butter within it. Seal the butter by folding the edges of the dough over it, then gently roll the dough to lengthen it, being careful not to press too hard. This initial rolling should create a new, larger rectangle.
Fold the dough in thirds, like a letter, then rotate it 90 degrees. This is one complete turn. Rest the dough in the refrigerator for at least 20 minutes between turns to keep the butter firm and maintain distinct layers. Generally, three to four turns are needed. Always maintain a lightly floured surface to prevent sticking, which can inhibit layer formation.
As you work the dough, ensure even rolling to avoid thin spots that could lead to uneven baking. With patience and precision, the layers will puff up beautifully in the oven, resulting in the desired texture of your pain au chocolat.
Baking Guidelines
Preheat your oven to the optimal temperature of 375°F (190°C) to ensure a golden, flaky crust. Place your pain au chocolat on a baking sheet lined with parchment paper, allowing enough space between each to cater for expansion during the baking process.
For even browning, rotate the baking sheet halfway through the suggested baking time of 15-20 minutes. Keep a watchful eye on the pastries as oven temperatures may vary, and adjust accordingly.
A sign of perfectly baked pain au chocolat is a deep golden-brown color with a firm, crisp exterior. If an instant-read thermometer is available, the internal temperature should reach approximately 190°F (88°C), indicating the pastries are done.
Cooling on a wire rack is essential after baking to prevent the bottoms from becoming soggy. The cooling process allows the structure to set and the flavors to develop, ensuring that the texture remains flaky and the chocolate melts perfectly with each bite.
Remember, ovens may have hot spots or temperature inconsistencies, so knowing your oven and making necessary adjustments is crucial for achieving the best results.
Notes On Troubleshooting Common Issues
If the dough is tearing during lamination, it may be too cold. Allow it to rest at room temperature for 10-15 minutes before continuing to roll it out. This prevents gluten over-development, which can make the dough less pliable and more prone to tearing.
Should the butter break through the dough layers, it’s a sign that it’s either too hard or being rolled out too aggressively. Ensure the butter is pliable but still cool before encasing it in the dough, and apply gentle, even pressure when rolling.
Uneven rising can result from inconsistent dough thickness or improper proofing conditions. Aim for uniform thickness when rolling out the dough and proof in a warm, humid environment. If necessary, a turned-off oven with a pan of warm water can create a suitable proofing atmosphere.
For overly browning pastries, the oven temperature may be too high. Use an oven thermometer to verify the accuracy of the oven settings and adjust accordingly. Additionally, position the rack in the center of the oven and rotate the baking sheet halfway through for even baking.
If the chocolate burns or leaks out, consider using high-quality baking chocolate with a lower cocoa butter content to withstand the baking time. Place the chocolate properly within the dough and make sure to seal the edges well to prevent leakage.
Stale or spongy texture indicates over-proofing or under-baking. Adhere to proof times and check for a hollow sound when tapped to ensure the pastries are fully baked. Remember, ovens may vary, so adjust baking time as necessary for a crisp, flaky result.
Here's Something More
 Mouth-Watering Chocolate Sourdough Recipe: A Baker’s Dream
 Decadent Chocolate Pizza: Your Sweet Tooth’s Best Friend
 Perfect Chocolate Bonbon Recipe: Impress With Homemade Delights
 Ultimate Chocolate Biscuit Recipe for Sweet Cravings
 Elevate Your Treat Game: Chocolate Chip Shortbread Recipe