Unleash your creativity and elevate your chocolate desserts by learning how to use chocolate transfer sheets effectively.
Chocolate transfer sheets are a fantastic tool for adding intricate designs to your chocolate creations. They are thin, flexible sheets coated with cocoa butter and a powdered food coloring that transfers a design onto the surface of chocolate.
Using these sheets is not as complex as it might seem. First, melt your chocolate and let it cool to about 86-88 degrees Fahrenheit. Then, cut your transfer sheet to fit the size of your chocolate. Place the sheet on the chocolate with the design side facing the chocolate. Apply gentle pressure to ensure the sheet sticks to the chocolate. Let it set, then peel off the sheet, revealing the design on your chocolate.
This guide will delve into the details, including the type of chocolate to use, how to temper the chocolate, and how to store your finished creations.
Key takeaways:
- Chocolate transfer sheets add intricate designs to chocolates.
- Sheets are composed of cocoa butter and food coloring.
- Apply sheets to cooled, tempered chocolate with gentle pressure.
- Quality matters when selecting transfer sheets.
- Practice and experimentation lead to beautiful chocolate creations.
Inside
Understanding How Chocolate Transfer Sheets Work
Chocolate transfer sheets, primarily composed of cocoa butter and food coloring, impart visually stunning and creative designs onto the surface of chocolate. They are incredibly thin and malleable, which allows for easy application onto both flat and curved chocolate surfaces.
Upon applying heat, the cocoa butter melts and releases the food color imprint onto the chocolate surface. This process works due to the similar melting points of cocoa butter in the transfer sheet and chocolate itself.
Key ideas involve:
- Cocoa butter and food coloring compose the sheets
- Thin and flexible for easy application on various surfaces
- Heat application leads to design transfer
- Similar melting points of substances ensure an effortless transfer
To start effectively using chocolate transfer sheets:
- Begin with tempered chocolate
- Place the sheet onto the chocolate, texturized side down
- Briefly apply heat, allowing the design to imprint
- Cool for the design to set
- Remove the sheet revealing the transferred design
Remember, practice is key in mastering this skill, and the result is a beautifully decorated chocolate, adding a professional touch to your culinary creations.
Selecting Quality Chocolate Transfer Sheets
Quality matters when selecting chocolate transfer sheets.
Firstly, it’s important to assess the clarity of the designs on the sheets. The more defined and sharp the designs, the better they will transfer onto the chocolate.
Secondly, consider the sheet’s flexibility. Transfer sheets should be sturdy but flexible, ensuring they can easily wrap around or mold to your chocolate confections.
Thirdly, look for sheets that have a smooth surface, as this affects the smoothness of your final chocolate product.
Lastly, make sure the sheets are food-safe. Reputable companies will clearly label their transfer sheets as such. Stay away from sheets without this assurance.
Researching and comparing brands can also come in handy. Brands with positive reviews and a reputation for quality are often dependable choices.
Preparing the Chocolate for Transfer
Before embarking on the transfer process, ensuring the chocolate is adequately prepared is vital. Begin by choosing a high-quality chocolate, preferably couverture, known for its higher cocoa butter content, which results in a glossy, snappy finish and a richer flavor.
Tempering the chocolate is the next crucial step. It involves gently heating the chocolate, cooling it down, and then reheating it to create a smooth, shiny finish that’s ideal for transfers. The ideal temperatures for this process vary for each chocolate type – Dark: 45°C (113°F) – cool to 28°C (82°F) – reheat to 31°C (88°F), Milk: 45°C (113°F) – cool to 27°C (80°F) – reheat to 30°C (86°F), White: 45°C (113°F) – cool to 27°C (80°F) – reheat to 29°C (84°F).
Next, spread the tempered chocolate evenly onto the textured side of the transfer sheet, ensuring all corners are covered. Use a spatula or bench scraper for an even spread. The thickness of the spread should ideally be about 1/8 inch.
Leave the spread to cool slightly until it’s just about to set. This is the initial preparation required for a chocolate transfer. Timing and maintaining the chocolate’s proper temperature are pivotal points for a successful transfer.
Step-by-Step Guide On How to Use Chocolate Transfer Sheets
To begin, melt the selected chocolate until it reaches a smooth consistency. It’s important to take note that different types of chocolates—dark, milk, or white—have various melting points. Ensure to follow specific instructions on your chocolate packet.
Next, place the chocolate transfer sheet on a flat and clean surface. The sheet should be positioned such that the textured side is up, as this is the side that your design is transferred from.
Once the chocolate is melted, gently spread a thin layer over the transfer sheet using a spatula. The chocolate shouldn’t be too hot—ideally around 86-90F (30-32C). This ensures that the sheet’s cocoa butter-based design melts effectively into the chocolate.
The spread chocolate needs to set, but it should not be completely hard. The chocolate transforms from glossy to matte, which indicates that it’s at the perfect ‘snap’ stage—still flexible without breaking.
At this point, you can apply the set chocolate to the desired edible surface or mold. Gentle pressure is necessary to ensure the design transfers thoroughly. Use a small rolling pin if you’re covering a larger area, such as a cake.
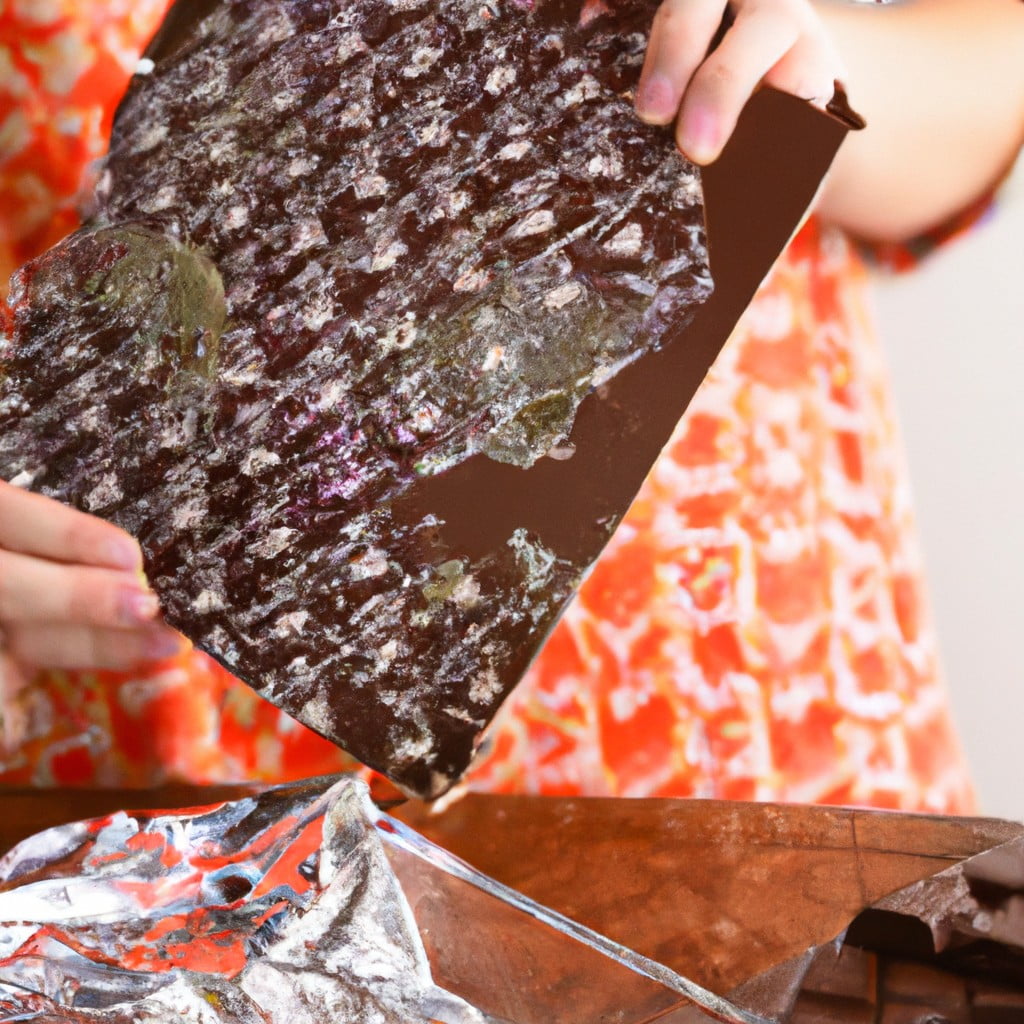
To finalize, place the decorated item in the refrigerator. The cold temperature helps the chocolate to further set and the transfer to fully release. After resting, carefully peel back the transfer sheet to reveal the chocolate adorned with a beautiful design.
Remember to store any unused transfer sheets in a cool, dry place away from direct sunlight to prevent the designs from fading.
Tips and Tricks for Using Chocolate Transfer Sheets Effectively
Before beginning, ensure the transfer sheet is at room temperature. This aids in the smooth transfer of designs.
Cutting the sheet to match the size of the mould can prevent wastage. Keep in mind that design side should be up when you apply it on the firm chocolate.
While applying the sheet to the mixture, avoid any moisture or condensation. Both can prevent successful image transfer. Keep the kitchen dry when working!
Tempering chocolate correctly is crucial for a clear print. If the chocolate is too hot, the design might smear; too cool, and the design may not transfer properly.
Allow the sheet to stay on the firm chocolate for a few moments before peeling it off. This ensures the design has completely transferred.
Peel off slowly! Quick actions can rip the chocolate or cause the design to become distorted.
Be experimental and imaginative. Use different colored chocolates or try layering designs for a unique effect.
Cleaning up immediately after use can prolong the life of your transfer sheets. A quick wipe with a damp cloth, followed by a dry one, keeps them ready for next use.
Remember, practice makes perfect. Don’t be disheartened if you don’t master the technique right away. Have fun and enjoy the process.
Troubleshooting Common Problems With Chocolate Transfer Sheets
It’s not uncommon for the uninitiated to encounter difficulties when using chocolate transfer sheets. Rest assured, every problem has a solution.
If patterns aren’t transferring properly, the consistency of the chocolate might be the issue. Ensure it’s tempered correctly as per manufacturer’s instructions. An improperly tempered chocolate won’t harden as it should, preventing the pattern from sticking.
Smudged or imprecise patterns can be due to hasty or rough handling. To achieve a crisp, clean transfer, gently smooth the sheet on the chocolate. Remove it calmly and evenly once the chocolate has fully set.
Sometimes, you might notice air bubbles. Avert this by spreading the melted chocolate evenly and smoothly, eliminating any chances for air to get trapped.
Another common problem is the transferred pattern not having vibrant colors. This can happen if the chocolate has cooled too quickly. Try to maintain an optimal room temperature for the chocolate to cool gradually.
Finally, if the transfer sheet sticks to the chocolate, it probably means the chocolate hasn’t set fully. Patience is key – give it ample time to dry and harden before peeling off the transfer sheet.
Creatively Using Chocolate Transfer Sheets for Diverse Confectionery Creations
Delving directly into the creative potential of chocolate transfer sheets requires a bit of out-of-the-box thinking. Coupled with some basic knowledge of baking and confectionery, chocolate transfer sheets can morph ordinary treats into a bunch of aesthetically pleasing delicacies.
– Decorate cupcakes. Use the sheets to add an eye-catching and tasteful chocolate design on top of the frosting. Simply cut out small portions of the sheet to fit atop each cupcake, allow the chocolate to cool and peel it off.
– Biscuit or cookie adornment. Take cookie baking up a notch. Once you’ve got a freshly baked batch, utilize your chocolate transfer sheets to create a pattern or image to get more appealing cookies.
– Chocolate-covered fruit decorations. Elevate your chocolate-dipped strawberries by adding a strip of patterned chocolate around the berry, resulting in a striking, yummy piece of artwork.
– Patterned chocolate barks. Spread tempered chocolate over a chocolate transfer sheet, wait for it to set, then break into pieces for a visually stunning treat.
– Refined hot chocolate sticks. Use the chocolate transfer sheets to create the sticks with patterns, making the hot chocolate experience a bit more festive and sophisticated.
Remember to ensure your chocolate is tempered properly so absorption of patterns or images is seamless. Each application uses the same basic premise of transferring an edible design to your chosen confectionery. Embrace this tool and open up a whole new world of dessert decoration.
FAQ
What are chocolate transfer sheets made of?
Chocolate transfer sheets are composed of transparent acetate sheets with a layer of cocoa butter and a light dusting of confectioners’ sugar.
What is the process to apply chocolate transfer sheets?
To apply chocolate transfer sheets, melt and temper the chocolate, coat the dull side of the sheet with it, let it semi-set, and then peel the sheet away, leaving the design on the chocolate.
How does one properly store unused chocolate transfer sheets?
Unused chocolate transfer sheets should be stored in a cool, dry place away from direct sunlight and strong odors to preserve their quality and designs.
Are there any considerations one should keep in mind when selecting chocolate transfer sheets for a particular project?
When selecting chocolate transfer sheets for a project, it’s important to consider the type of chocolate (dark, milk, or white), the size and design of the sheet, and the sheet’s compatibility with your intended applications.
Here's Something More
 Mouth-Watering Chocolate Sourdough Recipe: A Baker’s Dream
 Decadent Chocolate Pizza: Your Sweet Tooth’s Best Friend
 Perfect Chocolate Bonbon Recipe: Impress With Homemade Delights
 Ultimate Chocolate Biscuit Recipe for Sweet Cravings
 Elevate Your Treat Game: Chocolate Chip Shortbread Recipe