Learn the straightforward technique to create elegant chocolate curls that can enhance the presentation of your desserts.
Key takeaways:
- Quality chocolate is key for smooth, flexible chocolate curls.
- Choose dark, milk, or white chocolate based on preference.
- Spread melted chocolate thinly and cool to a pliable consistency.
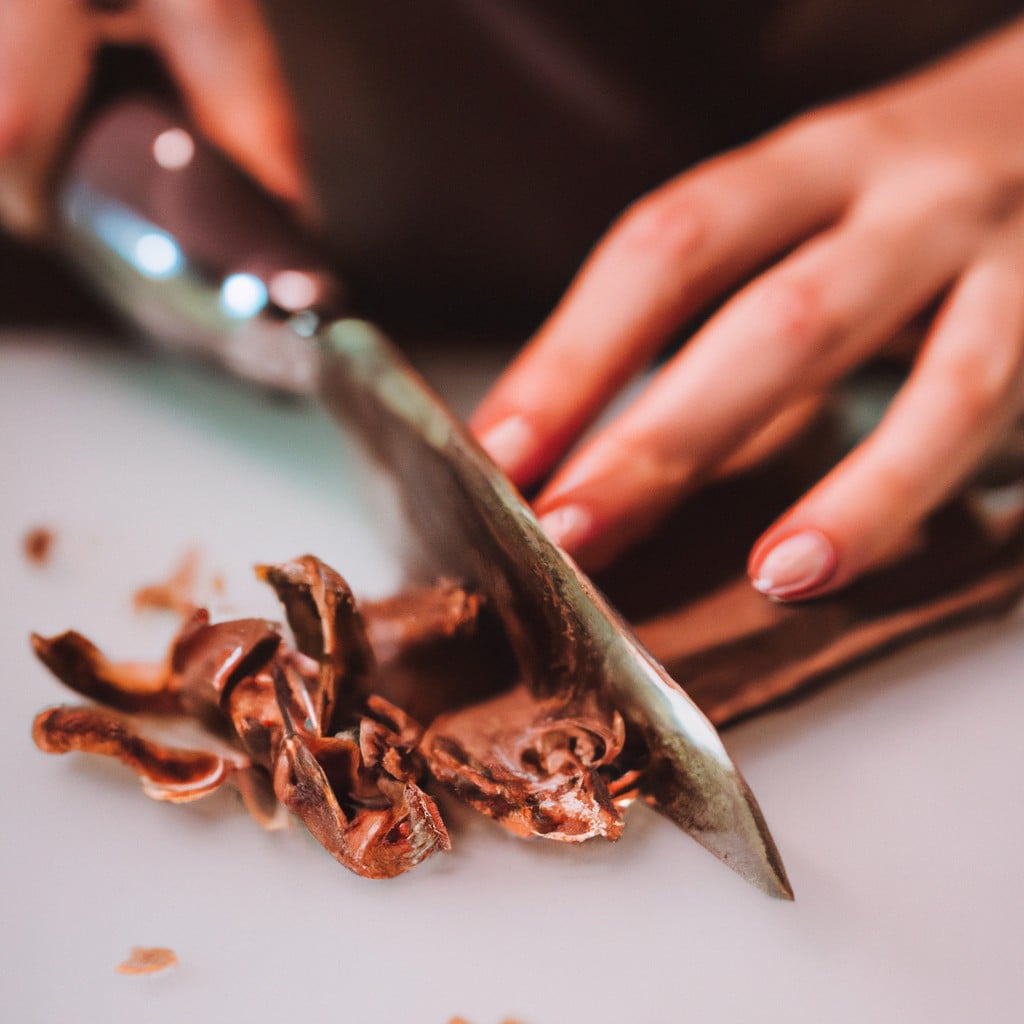
- Use a sharp tool at a 45-degree angle to create curls.
- Decorate desserts with chocolate curls for an elegant touch.
Inside
Items You’ll Need To Make Chocolate Curls
Before you begin crafting delicate chocolate curls, ensure your workspace is equipped with the key tools and ingredients:
- Quality Chocolate: Preferably a bar, either dark, milk, or white, according to preference.
- Vegetable Peeler: A sharp one provides the best control and results.
- Baking Sheet: Needed if chocolate requires initial melting.
- Parchment Paper: For lining the baking sheet to avoid sticking.
- Microwave or Double Boiler: To gently melt the chocolate, if needed.
- Refrigerator: Helps the chocolate to set for optimal curling.
- Offset Spatula (optional): To carefully lift and handle the curls without breaking.
Each item assists in achieving the perfect curl, from melting the chocolate to the right consistency, to creating smooth, elegant curls that will hold their shape on desserts.
Choosing the Right Type of Chocolate
Select a high-quality chocolate, as it will affect both the taste and the ease of curling. Chocolate with higher cocoa butter content is preferable, as it yields smoother, more flexible curls. Dark chocolate, known for its strong flavor and solid composition, is ideal for creating defined curls. Milk and white chocolates, though more sensitive to heat, are also suitable options and provide a sweeter taste.
Consider tempering the chocolate first; this process stabilizes the cocoa butter crystals, resulting in a glossy finish and a snap that holds the curl’s shape. Avoid compound chocolate or chocolate chips that contain stabilizers, which can make the curls brittle or difficult to shape.
For a uniform look, use a chocolate block or large bar. These provide a broad surface which helps in creating curls of consistent thickness and length.
Lastly, pay attention to the chocolate’s temperature. If it’s too warm, the chocolate will be too soft and may smear instead of curling. If too cool, it may crack or break. Aim for a comfortable room temperature when you start to create your curls.
Technique for Making Chocolate Curls
Begin with a smooth, flat surface—a baking sheet or a marble slab works well—and ensure your chosen chocolate is at the perfect temperature, ideally just slightly warmer than room temperature for better flexibility. Heat it gently if necessary.
Spread melted chocolate thinly over your chosen surface with an offset spatula to create a thin, even layer. Allow it to cool just to the point of setting but not hardening completely—as it should still be pliable.
For tight curls, use a bench scraper or a sharp knife. Hold the tool at a 45-degree angle to the surface of the chocolate and apply firm, steady pressure as you push forward. The chocolate should curl naturally as it is pushed. For larger, looser curls, a broad vegetable peeler works well against a block of chocolate. Lightly grip the chocolate block and draw the peeler across its broadest surface, creating ribbon-like curls.
Speed and pressure are key—working too slowly or with too little force may result in chocolate shavings rather than curls. Practice makes perfect; expect a few attempts to master the technique. Store the curls in a cool, dry place until ready to use to maintain their shape.
Using Chocolate Curls to Decorate Desserts
Chocolate curls add an elegant touch to any dessert, transforming a simple sweet into a work of art. They are particularly effective when contrasting against smooth surfaces such as frosting, mousse, or glaze.
When applying curls, use a toothpick or tweezers to carefully position them without melting the chocolate with your fingers. Sprinkle curls unevenly for a natural, whimsical look, or place them strategically for a designed pattern. They work well atop cupcakes, cakes, puddings, and tarts.
The size of the chocolate curls can be varied according to the dessert’s scale; use larger curls for grander desserts and finer shavings for individual servings or subtle accents. Lastly, refrigerate the dessert briefly after decorating to ensure the curls set in place.
Troubleshooting Common Issues With Chocolate Curls
If chocolate curls are breaking or not forming correctly, several factors could be at play:
- Temperature: Chocolate should be slightly warmed but not hot. If it’s too cold, it will snap; too warm, and it won’t hold the curl shape. Aim for a consistent temperature that’s just warm enough to allow the chocolate to be pliable.
- Thickness: When spreading the chocolate onto a surface, ensure even thickness. Thick slabs won’t curl well; thin ones may break too easily. Use a spatula or knife to achieve the uniformity required.
- Tool Sharpness: A dull peeler or knife can cause chocolate to crumble. Use a sharp tool for clean, smooth curls.
- Chocolate Quality: High-quality chocolate with a higher cocoa butter content is more likely to yield perfect curls due to its smoother melt and solidification properties.
- Setting Time: Allowing the chocolate to set just to the right consistency is essential. If it’s too set, it may break, and if it isn’t set enough, it may not curl. If it’s too set, gently warm the surface; if not set enough, chill for a few additional minutes.
By being mindful of these points, you can troubleshoot the majority of problems encountered when making chocolate curls.
Here's Something More
 Mouth-Watering Chocolate Sourdough Recipe: A Baker’s Dream
 Decadent Chocolate Pizza: Your Sweet Tooth’s Best Friend
 Perfect Chocolate Bonbon Recipe: Impress With Homemade Delights
 Ultimate Chocolate Biscuit Recipe for Sweet Cravings
 Elevate Your Treat Game: Chocolate Chip Shortbread Recipe