Discover how to transform ordinary pretzels into irresistible chocolate-covered treats with this simple guide.
Making chocolate covered pretzels is a delightful culinary adventure that combines the sweet allure of chocolate with the salty crunch of pretzels. This guide offers a simple, step-by-step process on how to create this delicious treat right in your kitchen.
It covers everything from selecting the right type of chocolate and pretzels, to the actual coating process, and even some tips on how to add a personalized touch with various toppings.
Stick around to discover the full details on how to master the art of making chocolate covered pretzels.
Key takeaways:
- Choose high-quality pretzels and chocolate
- Use a double boiler to melt chocolate
- Select pretzels with the right size, shape, and saltiness
- Decorate pretzels with toppings while chocolate is wet
- Store pretzels in an airtight container at room temperature
Inside
Ingredients for Chocolate Covered Pretzels
Acquiring the correct ingredients is the first important step to creating delightful chocolate covered pretzels. The simplicity of this sweet and salty treat belies the importance of selecting high-quality components.
First, pretzels are the core of this treat. Opt for either bite-sized pretzels or pretzel rods, depending on personal preference. The critical factor is choosing a brand known for its crispy, salty pretzels.
Second, the star of the show – chocolate. A smooth melting chocolate is essential, such as high-quality chocolate baking bars or chocolate melting wafers. Both dark and milk varieties can offer excellent results; ultimately the choice depends on one’s palate.
To add more flavors and visual appeal, consider grabbing white chocolate, sprinkles, crushed nuts, or even coconut shavings. These toppings offer variations and personalized touches to the pretzels.
Finally, don’t forget some wax paper for setting your completed pretzels, this prevents them from sticking during the cooling process and keeps your counters clean.
The Best Chocolate to Use in Chocolate Covered Pretzels
When selecting chocolate, there are several considerations to ensure optimal taste and texture for your chocolate covered pretzels:
Quality: Opt for high-quality chocolate, as it yields a smoother, more delicious coating. Premium chocolate brands often deliver richer flavor profiles.
Type: Choose between dark, milk, or white chocolate based on personal preference. Dark chocolate provides a pleasing bitterness, milk chocolate offers a mellow and creamy flavor, while white chocolate gives a sweet and subtle touch.
Composition: Always pick a chocolate with a high percentage of cocoa butter. It allows for a glossy finish and a satisfyingly crunchy shell once solidified.
Melting method: For melting your chosen chocolate, the double boiler method works best to ensure a smooth and evenly heated mixture. Microwaving chocolate can potentially scorch it if not handled correctly.
Tempering: If you aim for a professional finish, consider tempering your chocolate. This controls the crystallization of cocoa butter and results in shiny, flawless, and snap-perfect chocolate dips.
The right chocolate establishes the flavor foundation for your chocolate covered pretzels, so take your time and choose wisely.
The Best Pretzels to Use in Chocolate Covered Pretzels
When selecting pretzels for your chocolate endeavor, consider three critical aspects: size, shape, and saltiness.
Size is a crucial factor for the ideal chocolate-to-pretzel ratio. Mini pretzels are perfect for a bite-sized treat, offering an equal balance of chocolate and pretzel in each bite.
Shape also matters. Traditional twisted pretzels, with their timeless design, are prime for dipping and provide grooves for extra chocolate adherence. Stick pretzels serve as great alternatives, particularly for creating chocolate pretzel clusters.
Lastly, consider the saltiness. Opt for salted pretzels for a delightful contrast with the sweetness of the chocolate. However, choose wisely, as too much salt can overpower the chocolate flavor.
Experiment with different pretzels to find the style that best suits your palate – only then will you reach the apex of your chocolate covered pretzel adventure.
Before You Begin Your Covered Chocolate Pretzels
In preparation for creating your chocolate covered pretzels, ensure all ingredients and tools are easily accessible. Start with selecting quality pretzels – regular salted pretzels or pretzel sticks work well. Choosing your chocolate is key. All varieties (white, milk, dark) have their unique tastes. High quality chocolate melts smoother and creates a better taste.
To melt chocolate, using a double boiler method preserves its lusciousness. If one is not available, carefully microwave the chocolate, stirring at regular intervals to avoid overheating.
Lastly, prepare your workstation. Line a baking tray with parchment paper for placing the pretzels after dipping and decorating. This setup allows for faster, more efficient work. Having everything at arms reach ensures a smooth process from start to finish.
Method to Make Chocolate Covered Pretzels
Having gathered the necessary ingredients, ensure you have a baking sheet lined with parchment paper at hand before starting the process.
Begin by breaking up the chosen chocolate into uniform pieces. This will ensure even melting. You can perform this step in a microwave-safe bowl using short bursts of heat, with stirring in between, or use a double boiler on the stovetop. The goal is to achieve smooth, fully melted chocolate, without any lumps.
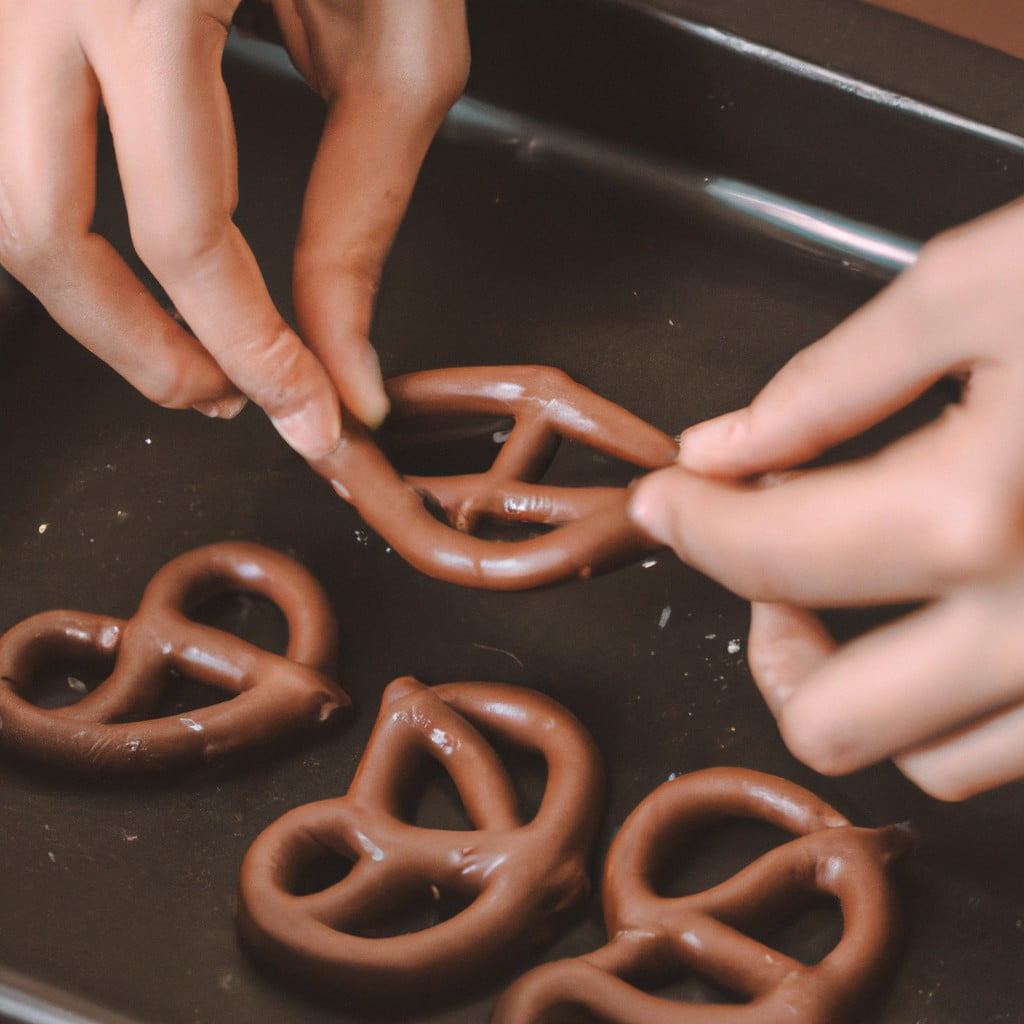
Meanwhile, arrange your chosen pretzels on the parchment-lined baking sheet. It is advisable to lay them out in a single layer to avoid overlapping, which could result in uneven chocolate coverage.
Once the chocolate is prepared, you can proceed to dip the pretzels. A simple technique involves holding a pretzel at one end and dipping it into the melted chocolate, turning if necessary, to ensure a generous coating.
Shake off any excess chocolate before placing the dipped pretzel back onto the parchment paper. Be sure to do this while the chocolate is still wet if you plan to add any additional decorations, such as crushed nuts or sprinkles.
Following these steps, and taking the time to work methodically, you can successfully create delicious, evenly-coated chocolate covered pretzels.
Directions for Making Chocolate Covered Pretzels
First, begin by melting your chosen chocolate in a fresh and clean heat-proof bowl set over a pot of gently simmering water. Stir occasionally until fully melted and silky smooth. Make sure not to let the water touch the base of your bowl to avoid overheating the chocolate.
Once your chocolate is prepared, set out your pretzels on a baking tray lined with parchment paper. This ensures a non-stick surface, of high importance when dealing with sticky chocolate.
Proceed to dip each pretzel in the melted chocolate, ensuring to coat it generously. A deep, wide bowl is the easiest way to do this. Use a fork to lift the chocolate covered pretzel out of the bowl of chocolate, enabling any excess to drip off.
After the pretzel is dipped, set it gently on your pre-prepared baking tray. If you wish to add any toppings, such as sprinkles, finely chopped nuts, or sea salt, be sure to do this before the chocolate hardens.
Finally, allow the pretzels to rest until the chocolate has fully set. This can take several hours at room temperature, but can be accelerated by placing them in the refrigerator for approximately 15 minutes.
It’s as easy as that! With these simple steps, you’re well on your way to making mouthwatering chocolate covered pretzels.
Easy Homemade Chocolate Covered Pretzels
Begin by melting the chocolate in a double boiler until it’s creamy and silky, with no lumps. Select only the finest quality pretzels, ensuring they have a good crunch and sufficient saltiness to counterbalance the sweet chocolate.
Once the chocolate is ready, dip each pretzel in, one at a time, until it’s thoroughly coated. Use a fork or chocolate dipping tool for easy lifting and let extra chocolate drip before placing on a baking tray lined with parchment paper.
For an even distribution of chocolate, ensure each pretzel is exposed to the melted chocolate for the same amount of time. During the process, keep the chocolate’s temperature consistent to avoid thickening, which makes dipping more difficult.
After dipping, decorate with desired toppings while the chocolate is still wet, so they adhere properly. Sprinkles, crushed nuts, candies, or even a drizzle of white chocolate can add an extra dimension to the flavor profile.
Let the pretzels dry completely at room temperature before they are handled, generally around 3-4 hours or faster in a cool place. Avoid rushing this step, since it enables the chocolate to set and encapsulate the pretzel effectively.
Remember, practice makes perfect. It may take a few pretzels to get a feel for the process, but it quickly becomes easy—and fun—to make these delightful treats.
Never immerse the pretzels fully in the chocolate; this method makes it harder to lift out and can potentially lead to a clumpy appearance.
Lastly, cleanliness is key. Ensure all utensils are clean and surfaces where food will be prepared are wiped down prior to starting. Chocolate can be a messy ingredient to work with, so having clean surfaces makes for simpler cleanup later.
How to Make Chocolate Covered Pretzels (Step By Step)
Begin by melting the chosen chocolate in a heatproof bowl over a pot of simmering water, ensuring that the water does not touch the bottom of the bowl. Stir the chocolate continuously until it reaches a smooth consistency.
Once the chocolate is melted, carefully remove the bowl from the heat to prevent the chocolate from scorching.
Next, take a pretzel and submerge it completely in the melted chocolate using a dipping tool or a fork. Submerge one pretzel at a time to get the best coverage possible.
Once the pretzel is fully engulfed in chocolate, lift the pretzel from the chocolate, allowing any excess to drip off back into the bowl.
After the excess chocolate has dripped off, lay the chocolate covered pretzel on a sheet of parchment paper or a silicone baking mat to dry.
Repeat the process of dipping and drying for each pretzel.
Last**l**y, if you have chosen to decorate your pretzels, do so while the chocolate is still wet. Apply sprinkles or crushed nuts evenly over the chocolate.
Leave the pretzels to sit at room temperature until the chocolate has set.
Remember to store your pretzels correctly in an airtight container, at room temperature, for up to 2 weeks.
Finally, keep in mind that you can customize your pretzels with different types of chocolates or various toppings to suit personal preferences or to match different occasions.
Decorate Your Chocolate Covered Pretzels
Once your pretzels are fully coated in melted chocolate, it’s the fun part – decorating. The beauty of it is that you can let your creativity flow freely.
Before the chocolate sets, you can sprinkle your pretzels with virtually any edible embellishment you favor.
Here are a few suggestions:
- Crushed nuts, such as almonds or peanuts – they not only add a delightful crunch but also a pleasing aesthetic touch.
- Shredded coconut – an excellent option for a tropical twist.
- Sprinkles – for a pop of color and fun.
- Crushed candies – candies like peppermint work especially well for special holidays like Christmas.
- White or dark chocolate drizzle – to create an attractive design on your pretzels.
Remember, whatever decoration you choose should be added while the chocolate is still wet to ensure proper adhesion. By the time the chocolate dries, your pretzels will have a delicious, professional-grade decoration that adds visual appeal and extra flavor.
Recipe Tips for Chocolate Dipped Pretzels
To ensure best results when making chocolate dipped pretzels, consider the following:
Use good quality chocolate: It melts smoothly and tastes superior. Dark, milk, or white chocolate can be used based on personal preferences.
Avoid getting moisture in your chocolate: Any water in the melting chocolate can cause it to seize and turn grainy. So ensure your utensils are completely dry.
Use room temperature pretzels: If your pretzels are too cold, the chocolate will harden too quickly, making it difficult to spread.
Double dipping for a thicker coat: If you prefer a thicker layer of chocolate on your pretzels, let the first coat harden and then dip the pretzels for a second time.
Layer with additional flavors: Consider rolling the freshly chocolate coated pretzels in chopped nuts, sprinkles, or crushed toffee for added texture and taste.
Gimmick-free melting: Melting chocolate can be as simple as using your microwave. Start by microwaving for 1 minute at 50% power, then stir, and continue to heat in 15-second increments, stirring each time until fully melted.
Monitor the drying process: After dipping, place the pretzels on a baking sheet lined with parchment paper and let them harden at room temperature. Avoid refrigerating as it can cause the chocolate to turn grey.
Take your time: Rushing the process won’t yield pretzels that you can be truly proud of. From melting the chocolate to allowing them to sufficiently dry, each step deserves its due time.
What You Need for This Chocolate Covered Pretzels Recipe
For this recipe, gather the following essential items:
- Pretzels: For this recipe, it’s advisable to use thick pretzels. However, mini pretzel twists could also work well.
- Chocolate: Dark, milk or white chocolate can be used as per preference. A higher quality chocolate will enhance the taste and texture.
- Toppings: This is optional, but can add an extra layer of flavor and texture. Choices could include crushed nuts, sprinkles, or sea salt.
- Double Boiler: This is used to melt the chocolate. If you don’t have one, a heat-proof bowl that fits securely over a pan of simmering water will work.
- Baking Sheet: To lay the freshly dipped pretzels on. This allows for a flat, neat drying process.
- Wax or Parchment Paper: Place this on the baking sheet for easy cleanup and to prevent the pretzels from sticking.
- Fork: This tool helps with the dipping and flipping of the pretzels in the chocolate.
- Airtight Containers: For storage. Proper storage ensures the pretzels maintain their taste and texture.
It’s important to have all these items ready before starting the process to ensure a smooth and enjoyable cooking experience.
How to Store Chocolate Covered Pretzels
Upon completion, allow the pretzels to dry for about 20 minutes at room temperature. Storing them immediately in an airtight container could cause the chocolate to sweat, resulting in a less attractive finish. When dry, your deliciously coated pretzels are ready for storage.
Select an airtight container. The aim is to keep your pretzels from exposure to air which can cause them to become stale. Plastic, glass, and metal containers with tight lids are viable options.
Place a sheet of parchment paper on the bottom of your storage container. This step prevents the pretzels from sticking to the container, keeping them intact.
Layer the pretzels carefully. Do not just throw them in as you may damage the chocolate coating. You want your pretzels to maintain their attractive finish.
If stacking is necessary, remember to place parchment paper between each layer. This prevents the pretzels from sticking to each other.
Finally, store the container in a cool, dark place. Avoid areas with high temperatures as heat can cause chocolate to melt. A pantry or cabinet away from heat sources like the stove, oven or direct sunlight is perfect.
Refrigerator storage is not recommended as the moisture can affect the chocolate’s texture and appearance.
FAQ
How many days ahead can you make chocolate covered pretzels?
Chocolate covered pretzels can be made up to one week ahead of being gifted or consumed.
Do you put chocolate covered pretzels in the fridge to harden?
Yes, you should put chocolate covered pretzels in the fridge to allow the chocolate to harden and set.
What type of chocolate is best for creating chocolate covered pretzels?
Semi-sweet or dark chocolate is best for creating chocolate-covered pretzels due to its rich flavor that complements the saltiness of the pretzels.
How can one ensure the chocolate adheres properly to the pretzel?
Ensure proper adherence of chocolate to the pretzel by completely submerging the pretzel in tempered chocolate and allowing it to cool and harden on a non-stick surface.
Are there any toppings or fillings that can enhance the flavor of chocolate covered pretzels?
Adding toppings like sea salt, crushed nuts, or sprinkles can enhance the flavor of chocolate-covered pretzels.
Here's Something More
 Mouth-Watering Chocolate Sourdough Recipe: A Baker’s Dream
 Decadent Chocolate Pizza: Your Sweet Tooth’s Best Friend
 Perfect Chocolate Bonbon Recipe: Impress With Homemade Delights
 Ultimate Chocolate Biscuit Recipe for Sweet Cravings
 Elevate Your Treat Game: Chocolate Chip Shortbread Recipe