Discover the simple steps to creating irresistible chocolate-covered apples, a treat that combines the crunchy freshness of fruit with rich indulgence of cocoa.
Creating chocolate covered apples is a delightful combination of sweet and tart, a treat that is as delicious as it is beautiful.
This article will guide you through a simple, step-by-step process to make this dessert, covering all the necessary details, from selecting the right apples to melting the chocolate perfectly.
Whether you’re preparing for a party or just satisfying a personal sweet tooth, this guide will ensure your chocolate covered apples are a hit.
All the information you need is right here, so let’s dive straight into the process.
Key takeaways:
- Select firm and fresh apples, like Granny Smith or Fuji.
- Choose the right chocolate – dark, milk, or white.
- Use high-quality couverture chocolate for best results.
- Melt chocolate using a double boiler or microwave.
- Dip apples in chocolate, decorate, and let them set.
Inside
Choosing the Right Apples for Dipping
Select apples that are firm and fresh, free of blemishes or bruises. Opt for smaller- to medium-sized fruits, as these are easier to handle while dipping. Granny Smith apples are a popular choice due to their tart flavor, which pairs well with sweet chocolate. Gala and Fuji apples are also excellent choices for a sweeter-tasting variety.
Wash the apples thoroughly in cool, running water to remove any waxy coating and dry them thoroughly. Waxy or moist surfaces may deter the chocolate from adhering properly.
Ensure to remove the stem and insert a sturdy stick into each apple. Wooden craft sticks or skewers are commonly used. Make sure the stick penetrates deeply enough to hold the apple securely, but avoid pushing it all the way through the other side.
Prep your apples ahead of time and keep them slightly chilled before the dipping process. This can aid in quickening the chocolate setting time.
Remember, starting with high quality fresh ingredients is key to making delicious chocolate-covered apples.
Selecting the Perfect Chocolate for Dipping
Different chocolates offer varying flavor profiles and melting points, therefore, choice hinges on personal preference and ease of use.
Cocoa solids constitute a basic factor underlying this decision. Dark chocolate, rich in these solids, delivers a robust, slightly bitter flavor. For a milder taste, you might opt for milk chocolate, which contains fewer cocoa solids and more milk solids. White chocolate, devoid of cocoa solids, offers a completely different, creamy and sweet profile.
Quality is important; couverture chocolate, renowned for its high percentage of cocoa butter, ensures smooth, even melting and a glossy finish, making it a popular choice for chocolatiers.
Chocolate chips may be convenient, but they are not recommended for dipping due to additives that prevent them from melting smoothly. Instead, opt for chocolate bars and chop them into evenly sized pieces for an easy, uniform melt.
Always avoid water contact with your chocolater as it can cause the mixture to seize and become grainy, rendering it unsuitable for coating.
Opt for a double boiler method or a microwave for melting – the former offers better control over the temperature, crucial to melt the chocolate without overheating, while the latter is time-efficient.
Remember to stir the chocolate frequently during the melting process, to achieve a smooth and shiny consistency ideal for coating your apples. Regular stirring also prevents the chocolate from burning, which can give it an unpleasant bitterness.
Melting should be stopped just before all pieces have dissolved. Let the residual heat do the rest as it will prevent the chocolate from becoming overly thick or seizing.
Trial and error is also a beneficial approach. Small-batch testing ensures you find your preferred chocolate type and the perfect melting method for a delectable result.
Preparing Your Apples for the Dipping Process
Before starting the dipping process, ensure your apples are well-prepared. Begin by washing them thoroughly to get rid of any residual wax, as this can make it difficult for the chocolate to adhere properly. After washing, dry each apple completely to avoid water interfering with the consistency of the melted chocolate.
The next step is removing the stems from your apples. A simple twist and pull should do the job. Now, it’s time to insert wooden sticks or skewers into the tops. Make sure they’re inserted firmly but do not push them all the way through to the other side. Once inserted, the stick should be able to support the weight of the apple and the additional weight of the chocolate.
Now, your apples are prepped and ready for a coat of chocolate. Remember, consistency is key. Each apple needs to be thoroughly prepared to ensure that the end result is perfect. If there are any imperfections on the apple’s surface, the chocolate may not stick properly. Take your time, and the reward will be delicious chocolate-covered apples every time.
Methods for Melting the Chocolate
One common way to melt chocolate is using a double boiler. This involves boiling a pot of water, placing a heat-resistant bowl on top, and adding the chocolate into this bowl. It’s crucial to ensure the bottom of the bowl does not touch the water and the steam heats the bowl evenly. Stir constantly to prevent the chocolate from burning.
Microwaving is another efficient method for melting chocolate. Chop the chocolate into small, even pieces and place them in a microwave-safe dish. Heat at half power in 30-second intervals, stirring between each, until the chocolate becomes smooth.
Lastly, consider the slow cooker method. The gentle, consistent heat of a slow cooker makes it ideal for melting large amounts of chocolate. Place the chocolate in the slow cooker on low, stirring occasionally until the chocolate is fully melted.
Remember, whichever method, it’s important to avoid getting water into the melting chocolate. As little as one drop can cause the chocolate to seize up, making it grainy and unusable. Also, be careful not to overheat the chocolate as this can make it clumpy. Your chocolate should be warm and completely melted, ready for the apple dipping process.
Techniques for Dipping Apples in Chocolate
Start with clean, dry apples and long, sturdy sticks or rods. Insert the stick into your apple from the stem end. Ensure that it is secure and can hold the weight of the apple as well as the chocolate.
For the dipping process, tilt the bowl on its side to create a deeper pool of melted chocolate. This will help you dip each apple more effectively. Hold the stick and dip the apple into the bowl, turning it to cover all sides. Aim to dip about three-quarters of the way up the apple, leaving a bit of the fruit exposed for a tempting visual contrast.
After each apple is sufficiently coated, gently shake it over the bowl to remove excess chocolate. Turn the apple around slowly as you do this to ensure an even distribution of chocolate as it begins to set.
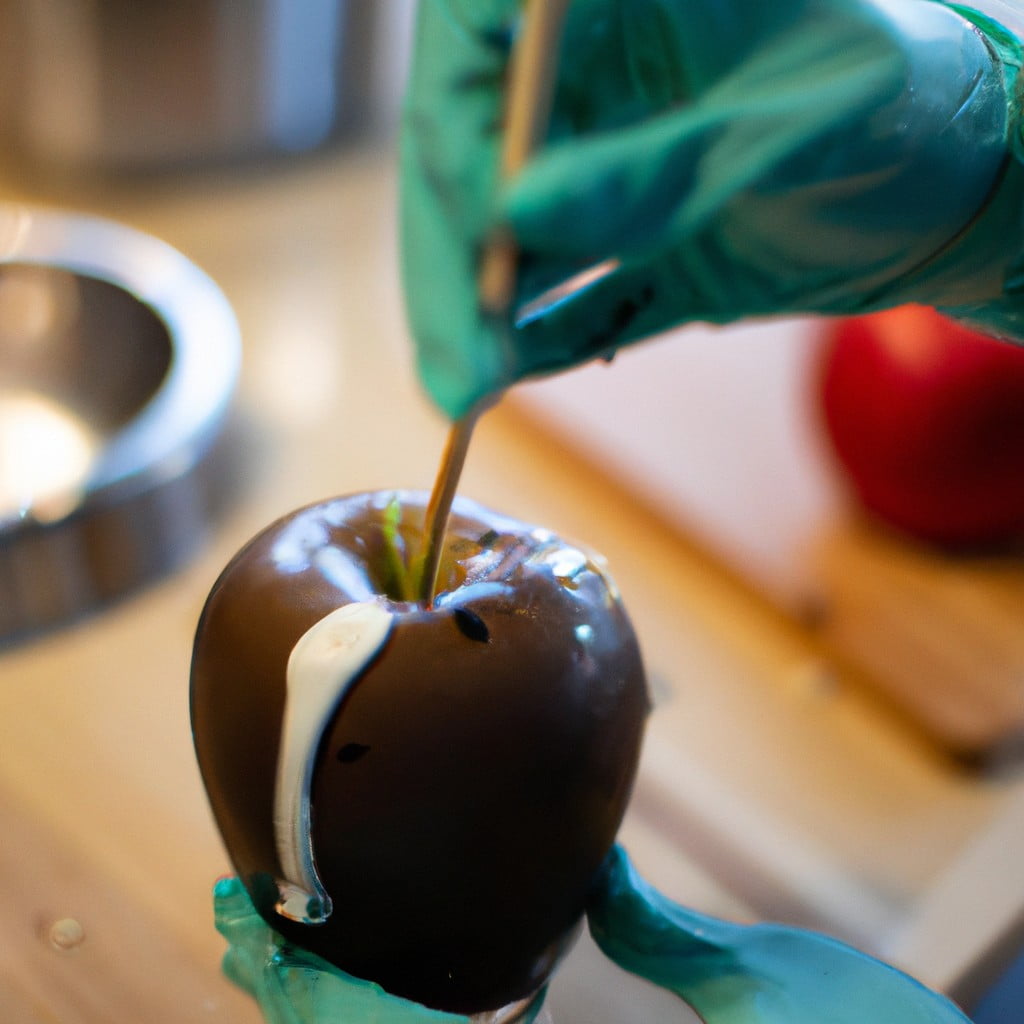
If you have additional toppings or confections for your apples, now is the time to dip or sprinkle them onto the wet chocolate.
Now, transfer your apple onto a baking sheet lined with wax paper. This gives the chocolate a smooth surface to set on, preventing it from sticking to the sheet. Remember, handle the apples by the sticks to keep your hands clean and prevent smudging the chocolate.
Finally, allow enough time for your chocolate-covered apples to set. This can take anywhere from 20 minutes to an hour, depending on the type of chocolate used and the room’s temperature. Cooling in a refrigerator can speed up this process. Be patient, the smoother and firmer the chocolate set on your apples, the better they will taste and look.
Revisit these steps for each apple. Work quickly to ensure your melted chocolate remains fluid and warm enough for an even coating.
Setting and Cooling the Chocolate On Apples
Once perfectly coated with chocolate, place the apples carefully on a baking sheet lined with parchment paper. This will prevent the chocolate from sticking to the surface. Make sure the apples are placed upright and not touching each other to avoid them sticking together.
To cool and harden the chocolate coating, transfer the baking sheet into the refrigerator. It usually takes about 15 to 20 minutes for the chocolate to fully harden. This process could take longer depending on the thickness of your chocolate layer.
You can test if it’s ready by lightly touching the chocolate surface of one apple. If it’s firm and no chocolate comes off, it’s set. Make sure not to leave them in the refrigerator for too long as this could cause condensation to form on the surface of the apples when taken out, leading to a less appealing finish.
Remember, during the cooling process, refrain from touching or moving the apples around frequently as this could disrupt the setting of the chocolate and leave marks on the shiny surface.
Ideas for Decorating Your Chocolate-Covered Apples
Once the chocolate is set, adding decorations can create a visual and flavor appeal. Sprinkle finely chopped nuts or coconut flakes over the chocolate while it’s still wet to ensure they adhere.
Drizzled caramel or white chocolate create an eye-catching appeal and add a nuanced flavor. Alternately, crushed candy like M&M’s or Oreos, add a festive feel.
If catering to a healthy palate, consider rolling the apple in granola or almond slivers. For a pop of color and texture, consider sprinkles, nonpareils, or even edible glitter.
Last but not least, for a sophisticated palate, try lightly sprinkling sea salt or crushed espresso beans. Remember to add these decorations before the chocolate fully hardens for best results.
Best Practices for Storing Chocolate Covered Apples
After the chocolate has completely set on your apples, wrap each one individually in a cellophane bag or cling film. Ensure you seal them well to keep air out, as exposure can cause the chocolate to “bloom,” or develop a white, powdery appearance.
Select a storage location that’s cool, dry, and away from direct sunlight. Although refrigeration can help preserve the fruit longer, be mindful that excessive cold might cause the chocolate to sweat or crack when brought back to room temperature.
Try to store them in an upright position, using egg cartons or specially designed candy apple sticks, to keep them looking their best.
Consume your chocolate covered apples as soon as possible, ideally within a week, for the best taste and texture. However, with appropriate storage, they can last up to a month.
Tip: If gifting or selling your chocolate covered apples, consider placing them in individual box containers with a clear panel to display your creative handy-work while maintaining their pristine condition.
Tips for Serving Chocolate Covered Apples
To add a visual treat to dessert tables, arrange the chocolate covered apples in a basket. Placing them on sticks can also add to the visual appeal. Drizzle a bit of white chocolate on dark or milk chocolate covered ones to give them a gourmet look.
For a whimsical touch, you could also use miniature paper umbrellas or flags. If you’re serving them at a party, you can customise these with the event’s theme.
At room temperature, they taste best. However, to make cutting easier, chill them in the refrigerator for a few minutes before serving.
Slice them just before serving so that the apples do not turn brown. To provide each guest with a variety of flavours, you might want to cut them into segments allowing them to sample different types of chocolate covered apples.
Remember, chocolate covered apples are rich in flavour so small pieces are often more enjoyable. It also makes it easier for guests to eat, especially if they are standing at a party.
To reheat any leftover chocolate covered apples, use a microwave on a very low setting to soften the chocolate without melting it completely. This makes the treats just as delicious the next day.
FAQ
Why is my chocolate not sticking to my apples?
The chocolate may not be sticking to your apples because they’re not well chilled before washing, drying, and dipping in the melted chocolate.
How far in advance can you make chocolate covered apples?
Chocolate covered apples can be prepared at least one week ahead without affecting their freshness and taste.
Do chocolate and apples go together?
Yes, chocolate and apples can be paired together to create tasty and versatile dishes like chocolate-dipped apples.
Which types of apple are best for making chocolate covered apples?
The best types of apple for making chocolate-covered apples are Granny Smith, Golden Delicious, and Fuji due to their firm texture and tart flavor that complements the sweetness of chocolate.
What are some ideas for toppings for chocolate covered apples?
Some popular toppings for chocolate covered apples include crushed nuts, coconut shreds, sprinkles, toffee bits, and mini marshmallows.
How can I store chocolate covered apples to maintain their freshness?
Store chocolate covered apples in an airtight container within a cool, dry area away from strong odors, and consume within a week for optimal freshness.
Here's Something More
 Mouth-Watering Chocolate Sourdough Recipe: A Baker’s Dream
 Decadent Chocolate Pizza: Your Sweet Tooth’s Best Friend
 Perfect Chocolate Bonbon Recipe: Impress With Homemade Delights
 Ultimate Chocolate Biscuit Recipe for Sweet Cravings
 Elevate Your Treat Game: Chocolate Chip Shortbread Recipe