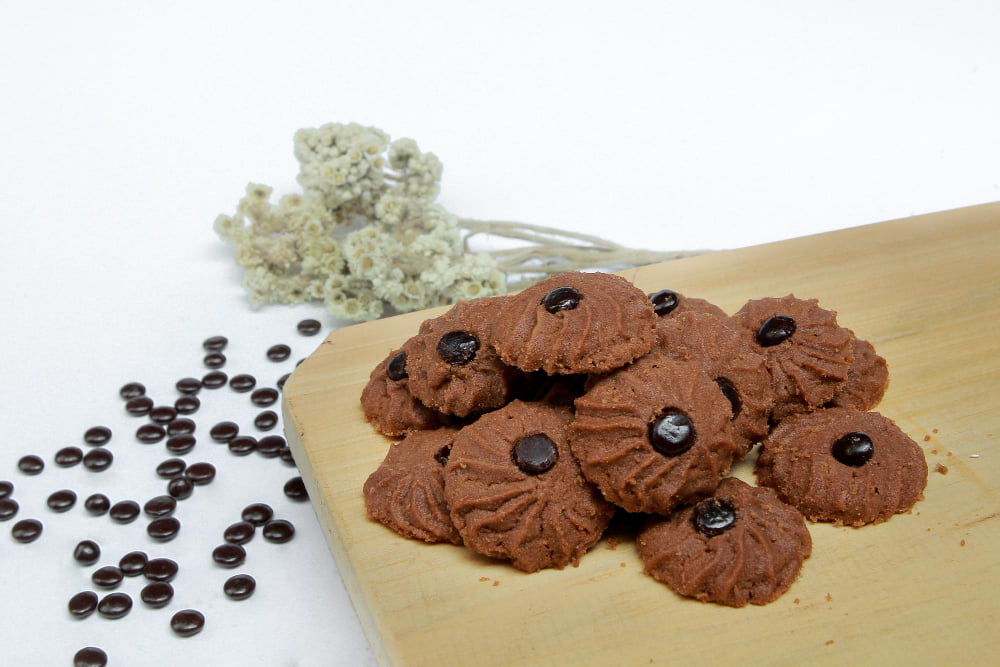
Explore the art of decorating chocolate chip cookies to enhance their visual appeal and taste.
Decorating chocolate chip cookies is an art that can elevate the simple delight of these baked treats to a whole new level. This article will guide you through a variety of creative and easy techniques to embellish your cookies, whether it’s for a special occasion or just to make your everyday snack a little more exciting.
From icing designs to edible glitter, you’ll find step-by-step instructions on how to transform your cookies into eye-catching pieces of edible art.
So, let’s dive into the world of cookie decoration and add a touch of magic to your chocolate chip cookies.
Key takeaways:
- Chill the dough before rolling to maintain cookie shape.
- Use various decorations like sprinkles, candy eyes, and whipped cream.
- Create delicious frostings like chocolate or vanilla buttercream.
- Use the right equipment like cookie cutters and piping bags.
- Properly store decorated cookies in an airtight container.
Inside
Chocolate Chip Cookie Cut-Out Recipe
Start with two cups of all-purpose flour, combined with a half teaspoon of both baking soda and salt. In a different bowl, cream together a cup of softened unsalted butter, then gradually add half a cup of white sugar and a cup of packed light-brown sugar to create a fluffy mixture.
Incorporate an egg and an additional egg yolk one at a time, followed by a tablespoon of vanilla extract for additional flavor. Slowly add the dry ingredients into the butter mix, being careful not to over-stir.
The star of the show, chocolate chips, come in next – add two cups of them into dough. Once all the components are perfectly blended, chill the dough for at least an hour before rolling it out. Post-chilling, roll out the dough on a lightly floured surface to about half-inch thickness and use cookie cutters to achieve desired shapes. Bake the cut-outs in a pre-heated oven at 325°F for about ten to twelve minutes until the edges become slightly golden. Let cookies cool before starting the decoration process.
Remember to use softened butter for easy creaming and chill the dough to prevent spreading, which can alter the desired shape of your cookies.
Ingredients for Decorative Chocolate Chip Cookies
To embark on the decadent journey of creating festive chocolate chip cookies, the ingredients required include:
- All-purpose flour in the quantity of 2 1/4 cups; provides structure.
- Half a teaspoon of baking soda; ensures the cookies rise.
- Salt, just a pinch; balances sweetness.
- Full-fat unsalted butter, a cup; contributes to the rich mouthfeel.
- Sugar in two types: granulated (3/4 cup) and brown (3/4 cup); adds desirable sweetness.
- A couple of eggs; helps in binding.
- Two teaspoons of pure vanilla extract; enhances flavor.
- A package (about 12 ounces) of chocolate chips, your preference whether dark, milk or semi-sweet. Save some for decoration.
- Remember to have edible decorations at hand: colored sprinkles, icing in various colors, and edible glitter, among other items that inspire creativity.
Use these ingredients to define your baked symphony, each element playing a unique role in the creation of decorative chocolate chip cookies.
Instructions for Baking Decorative Chocolate Chip Cookies
Begin by preheating your oven to 375°F (190°C). While the oven heats, roll the cookie dough to approximately 1/4-inch thickness on a lightly floured surface. Use an assortment of cookie cutters to shape your cookies. Ensure to dip the cookie cutters in flour before each use to prevent the dough from sticking.
When your cookies are cut to satisfaction, gently place them onto a non-stick or lined baking sheet, leaving about 2 inches of space between each cookie to allow for slight spreading while baking. Bake the cookies for 9 to 11 minutes, or until golden around the edges. While the cookies are baking, it’s best to prep your decorating tools and clear some workspace.
Once completely baked, leave the cookies to cool on the baking sheets for 5 minutes before transferring them to a wire rack to cool completely. The cookies must be completely cooled before decorating; any residual heat could cause your icing to melt.
Next, divide your chosen decorations – spritzes, fondant, edible glitter or colored sugar – into individual bowls for easy access during decorating. Prepare your royal icing or chocolate ganache, and place into piping bags ready for decorating.
Take each cookie, one at a time, and gently pipe on your chosen designs using the piping bags. Refer to the chosen design stencils or sketch, never rush. Be creative and feel free to experiment with a combination of designs but remember, less is often more when it comes to cookie decorating.
Creamy Chocolate Frosting for Cookie Decoration
For a delectable and eye-catching decoration, creamy chocolate frosting is a very good choice. It has a rich and chocolatey flavour, with a smooth texture that is perfect for decorating purposes.
To make it, you’ll need to melt butter and dark unsweetened cocoa powder over low heat until it forms a homogeneous mixture. The heat needs to be low to avoid burning the butter. Turn off the heat once the butter and cocoa combine well.
Then, in a separate bowl, mix icing sugar and milk. You’ll want to stir these gradually into the cocoa and butter mixture to obtain a luscious, creamy texture. The speed of mixing in sugar and milk matters: add them too quickly and the frosting may turn out gritty, which won’t yield a smooth decorating result.
Last step involves beating in some pure vanilla extract to the frosting. The combination of chocolate and vanilla provides an irresistible aroma and taste to the frosting. It is also important to beat the mixture well for a perfect consistency. If the frosting is too thick, add more milk; too thin, add icing sugar.
Use a piping bag or a spatula to apply this creamy chocolate frosting on your freshly baked chocolate chip cookies. Remember to wait until the cookies have completely cooled off before decorating to prevent the frosting from melting. With steady hands and your creativity, you can create a variety of designs with this tasty frosting.
In case of leftover frosting, it can be stored in a refrigerator for later use, which might come in handy for a quick cookie makeover.
Vanilla Buttercream Frosting for Cookie Decoration
Crafting a creamy, smooth vanilla buttercream frosting is a simple task that demands few ingredients. Start by gathering unsalted butter, vanilla extract, powdered sugar, and milk.
First, let the unsalted butter reach room temperature and then whip it using an electric mixer until it turns light and fluffy. This step ensures that the frosting has a smooth base.
Then, consider the vanilla extract. The quality of extract plays a vital role in the flavor of the frosting. Always opt for a pure, high-quality vanilla extract for an undeniably rich, deep vanilla taste.
Next, gradually add powdered sugar to the whipped butter. This method helps to prevent clumps and maintain a smooth consistency. Continue mixing until the sugar is completely incorporated.
The final touch involves adding milk. Begin with a small amount, then add more as needed to achieve the perfect consistency for spreading or piping onto your chocolate chip cookies. Keep in mind that adding too much milk can result in a runny frosting that won’t hold up on the cookies.
Important to note is that the process of frosting requires a gentle hand along with tools such as a spatula or a piping bag and tips, depending on the desired decoration. The cooled cookies can now be frosted according to your preference and creativity.
Use of Sprinkles, Candy Eyes, and Whipped Cream in Cookie Decoration
Sprinkles add vibrant colors and texture to the cookie surface. Before the frosting dries, gently press the sprinkles onto it, ensuring they adhere properly, for a festive, crunchy bite.
Candy eyes make cookies come to life especially at themed parties. Place these on the semi-dry frosting to make entertaining faces and designs.
For a rich addition, whipped cream can also be used. It’s not only for topping your hot cocoa, but provides a soft, fluffy texture contrast. Using a piping bag, you could create a myriad of designs or simply dollop it on top. Remember to serve these immediately as whipped cream can lose its form over time.
In all cases, applying decorative elements should be done after the cookies have cooled completely to avoid melting or bleeding. Thoughtful placement can turn an ordinary chocolate chip cookie into an artistic masterpiece.
Equipment Needed for Cookie Decorating
To embark on your cookie decorating journey, enlisting the help of certain tools can make the process easier, more precise, and significantly more enjoyable.
A wide variety of cookie cutters—ranging from standard shapes to festive specialized patterns—allow for creativity when cutting the dough.
Piping bags, which can be filled with various colored frosting, equip you to draw intricate designs onto your cookies. Beginners might opt for disposable bags, while reusable silicone bags could be a choice for avid bakers.
Writing tips for the piping bags assist in the application of more detailed drawings or text.
Different-sized spatulas, particularly an offset spatula, help in spreading a base layer of frosting evenly across the entire cookie.
Food coloring, particularly gel or paste types, give your frosting a vibrant hue, providing a visually appealing contrast to the cookie’s brown undertones.
Cookie drying racks offer a sanitary and practical solution for letting your decorated cookies set without risking frosting smudges.
Lastly, a minimalist yet essential tool, toothpicks can help correct tiny decorating mistakes or be used to apply small details in your icing.
These are the essentials, but remember that the true beauty of cookie decorating lies within your creativity. Using these tools as a guide, your decorated chocolate chip cookies are sure to impress.
Tips for Maintaining Cookie Shape During Baking
Firstly, chill the dough before baking. A cold dough will spread less in the oven thus maintaining its shape.
Secondly, consider the baking time. Under or over-baking can lead to cookies losing their form. Monitor the cookies while baking until they are golden brown as each oven has varying temperature levels.
Thirdly, allow sufficient space between cookies on the baking sheet. This will prevent them from merging into each other while they’re expanding in the oven.
Lastly, another helpful hint is to use a silicone baking mat or parchment paper on the cookie sheet to prevent the cookies from sticking and deforming when removed.
Storage Tips for Decorated Chocolate Chip Cookies
Proper storage helps prolong the freshness of your decorated chocolate chip cookies.
Ensure all decorations and frosting have fully set before storing. This prevents smudging or the decoration from sticking to the container.
Store these delightfully adorned treats in an airtight container at room temperature. This will keep them fresh for about a week.
If you need more time, consider freezing them. Place the cookies in a freezer-safe container or bag, separating layers with wax paper to prevent sticking.
To enjoy a frozen cookie, take it out of the freezer and let it stand at room temperature. Don’t use the microwave or oven to defrost, as this may affect the texture, decoration, or taste.
Remember, cookies with cream cheese or whipped cream frostings should be stored in the refrigerator to prevent spoilage.
Always avoid storing cookies in a container with other types of cookies or baked goods to prevent flavor transfer. Individual silicone baking cups can be used to further isolate each cookie and protect from damage to the decoration during storage.
FAQ
What can I use to decorate cookies?
You can use frosting or icing and sprinkle on colored sugar or other decorations to decorate cookies.
How do you stick decorations to cookies?
To stick decorations to cookies, apply a layer of thinned icing or glaze, then swiftly add your choice of sprinkles, edible glitter, or chopped nuts before the glaze dries.
Which makeup method is used for chocolate chip cookies?
The creaming method, which involves creaming the butter and sugars together before adding eggs and dry ingredients, is used for making chocolate chip cookies.
How do you decorate cookies before baking?
Before baking, cookies can be decorated by rolling balls of the uncooked dough in sprinkles or sugars, then slightly flattening them before placing on the baking pan, or by incorporating the sprinkles directly into the dough mix for a uniform color throughout.
What kind of edible decorations are suitable for chocolate chip cookies?
Suitable edible decorations for chocolate chip cookies include colored sugar sprinkles, icing, fondant shapes, edible glitter, and chocolate drizzle.
Can you use colored icing to adorn chocolate chip cookies?
Yes, colored icing can be used to adorn chocolate chip cookies.
How can I create themed designs on chocolate chip cookies?
To create themed designs on chocolate chip cookies, you can use edible food paint or colored icing and specific stencils that match your theme.
Here's Something More
 Mouth-Watering Chocolate Sourdough Recipe: A Baker’s Dream
 Decadent Chocolate Pizza: Your Sweet Tooth’s Best Friend
 Perfect Chocolate Bonbon Recipe: Impress With Homemade Delights
 Ultimate Chocolate Biscuit Recipe for Sweet Cravings
 Elevate Your Treat Game: Chocolate Chip Shortbread Recipe